
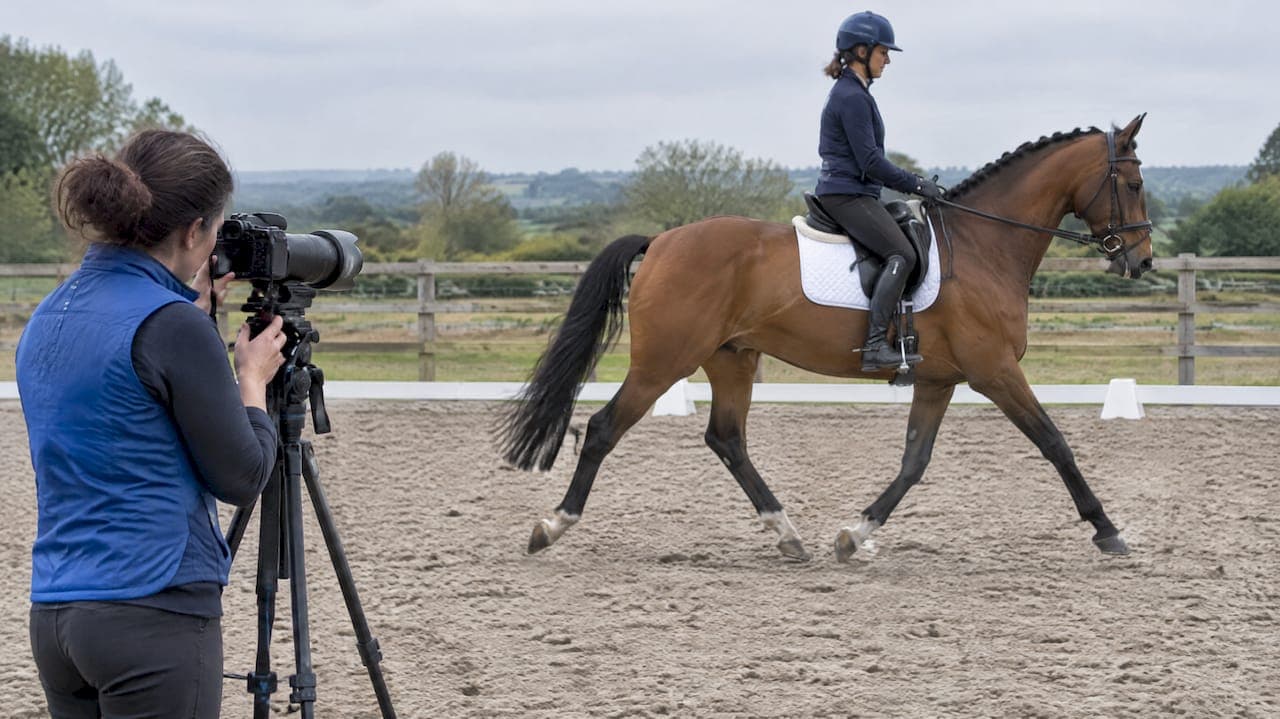
For routine trot stride timing in controlled settings, 60 Hz is typically adequate. Precise limb transitions and research kinematics call for 200 to 500 Hz, and specialised high speed work, such as resolving hoof impact in milliseconds, needs 1,000 Hz or more. The right tier depends on the shortest event you need to measure, plus your budget and camera access.
TL;DR:
- Capture hoof impact events at 300 to 400 Hz for precise timing, but routine gait analysis often suffices with 60 Hz or slightly higher frame rates.
- Use a shutter speed at least twice your frame rate, lock exposure manually, and ensure lateral camera placement to minimize errors in stride measurement.
- Validate inertial sensor data against optical motion capture in the field to prevent drifting and calibration errors during extended recordings.
- Synchronize high-speed footage with lower-rate video using visible sync markers or hardware triggers to maintain accurate event timing.
- Adjust frame rate based on the shortest relevant stride event, considering horse size, discipline, and whether the goal is research or field monitoring.
Table of Contents
- Recommended frame rates mapped to research and operational goals
- Practical capture settings for video and high speed footage
- How to calculate stride rate and stride length from frames
- Motion capture versus inertial sensors for field and lab work
- Synchronisation and combining high rate mocap with lower rate video
- How evidence led workflows turn gait captures into usable records
- Comparison of frame rates in different horse breeds or athletic disciplines
- Advances in camera technology enabling higher frame rates and their implications
- Impact of lighting conditions on effective frame rate and image clarity
- Balancing rigour and operational constraints in the field
- How a yard can operationalise movement analysis
- FAQ
- Sources
Recommended frame rates mapped to research and operational goals
Frame rate choice comes down to one question: how short is the event you need to see clearly? A trot stride lasts roughly a second, so capturing its overall timing needs far less temporal resolution than capturing the moment a hoof leaves the ground.
Equine gait analysis literature groups frame rates into three practical tiers. Sixty hertz is often adequate for trot stride timing when you are averaging across multiple strides. Two hundred to 500 Hz suits high precision research on limb transitions, where researchers need to pinpoint the exact frame a limb contacts or leaves the ground. One thousand hertz and above is reserved for specialised high speed cinematography, where even a few milliseconds of timing error would distort the result.

Dressage researchers commonly film at 150 to 240 frames per second when tracking stride length and speed changes through collected to extended trot transitions, a rate that sits comfortably in the research tier.
The physics behind this is straightforward. Stride duration and duty factor shrink as speed increases: trot stride duration can fall from around 0.9 seconds at a slow trot to roughly 0.6 seconds at a fast one. A hoof-on or hoof-off event within that stride might last only 20 to 60 milliseconds. The practical rule used across the field is to capture at least 8 to 10 samples across the shortest event you need to detect. If a hoof contact event lasts 25 milliseconds, you need a frame every 2.5 to 3 milliseconds, which means a frame rate in the 300 to 400 Hz range at minimum.
Higher frame rates are not free, though. Weighing them up:
- Reduced interpolation error: more samples across an event means less guessing about exactly when it started or ended.
- Larger file sizes: doubling frame rate roughly doubles storage and processing time for the same recording length.
- Lighting demands: shorter exposure per frame at high fps generally needs brighter, more even light.
- Equipment cost: cameras capable of sustained 500 Hz or 1,000 Hz capture cost considerably more than standard video cameras.
Matching the tier to the question, rather than defaulting to the highest frame rate available, keeps both the data and the budget manageable.
Practical capture settings for video and high speed footage
Getting usable footage is as much about camera settings as frame rate. A few settings matter more than the rest.
- Shutter speed: keep the shutter speed at least as fast as your frame rate, and ideally two to three times faster, to minimise motion blur on a moving limb. For 240 fps capture, a shutter speed of 1/500 or faster is a reasonable starting point.
- Lens and distance: use a focal length that keeps the horse filling a consistent portion of the frame without needing to pan, since panning introduces parallax errors into stride measurements.
- Sensor crop: a cropped sensor at high frame rate often means a narrower field of view, so check the effective angle of view before setting up at your usual distance.
- Exposure: lock exposure manually once set, since auto-exposure hunting between frames corrupts brightness consistency needed for automated tracking software.
- Record limits and heat: many consumer cameras throttle or stop recording after a few minutes of sustained high fps capture due to heat, so plan sessions in short bursts with cool-down gaps.
- File format and storage: uncompressed or lightly compressed formats preserve detail for frame-by-frame analysis but consume storage fast. Budget for several gigabytes per minute at 1,000 fps and plan offload between sessions.
- Camera placement: position the camera in the lateral plane, perpendicular to the horse's line of travel, at a fixed distance, with a visible scale reference (a marked pole or known-length object) in frame for later calibration.
Pro Tip: Film a short calibration clip of a ruler or marked pole at the exact distance and height the horse will pass through before every session. It takes thirty seconds and saves a recalibration headache later.
Lateral, perpendicular framing matters more than almost any other setting. Even a few degrees of camera skew introduces systematic error into every stride length calculation that follows.
How to calculate stride rate and stride length from frames
Once you have footage, deriving stride metrics is arithmetic, not guesswork.
- Count frames per stride: play the footage frame by frame and count how many frames elapse between the start of one stride cycle (say, left fore contact) and the next identical point.
- Calculate stride duration: divide frames per stride by frame rate. At 60 Hz with 54 frames per stride, stride duration is 54 ÷ 60 = 0.9 seconds.
- Calculate stride rate: divide frame rate by frames per stride. At 60 Hz with 54 frames per stride, stride rate is 60 ÷ 54 = 1.11 strides per second.
- Check a gallop example: at 240 Hz with 108 frames per stride, stride duration is 108 ÷ 240 = 0.45 seconds, and stride rate is 240 ÷ 108 = 2.22 strides per second, a realistic gallop figure given stride durations shorten markedly at speed.
- Calibrate distance: use the visible scale reference in frame to convert pixel distance travelled per stride into metres, then multiply by stride rate to estimate speed.
- Watch for aliasing: if a limb appears to "jump" between non-adjacent positions across consecutive frames, or if stride timing estimates vary wildly between repeat counts, the frame rate is too low to resolve that event reliably and you should move up a tier.
These calculations assume consistent camera distance and a true lateral view. Any change in either introduces proportional error into the stride length figure.
Motion capture versus inertial sensors for field and lab work
Optical motion capture and inertial measurement units (IMUs) solve the same problem from opposite directions, and the right choice depends on where you are working.
- Optical mocap strengths: precise 3D trajectories when configured at 200 to 500 Hz or higher, excellent for isolating individual joint and limb events.
- Optical mocap limits: requires multiple calibrated cameras, is vulnerable to marker occlusion, and is largely confined to lab or arena settings with controlled lighting.
- IMU strengths: portable, supports continuous monitoring across a full training session or in the paddock, and validated systems paired with machine learning models can estimate stride speed per stride with good accuracy.
- IMU limits: prone to drift over longer recordings and sensitive to exact placement on the limb or body.
Validated IMU systems can estimate stride metrics with good accuracy when paired with machine learning models tested against ground truth, which is why recent reviews of inertial sensor technologies describe them as increasingly preferred for field conditions where lab mocap is impractical.
The practical answer for most projects is not choosing one over the other permanently, but validating IMU output against a short optical mocap or instrumented shoe session before relying on IMU data alone for a larger study. That hybrid approach catches placement or calibration errors before they propagate through months of field data.
Synchronisation and combining high rate mocap with lower rate video
Fusing a 240 Hz mocap stream with standard video footage only works if both are aligned to the same timeline.
- Hardware sync: trigger pulses or genlock signals sent to all recording devices simultaneously give the most reliable alignment.
- Visible sync events: an LED flash or an instrumented shoe strike visible to every camera provides a cross-system ground truth marker when hardware sync is not available.
- Software timestamps: internal device clocks drift over time, so rely on them only for short sessions or as a backup to a visible sync event.
- Resampling: when aligning a high-rate stream to lower-rate video, interpolate rather than simply discarding frames, so event timing within the stride is preserved.
UC Davis's gait analysis guidance treats a visible sync pulse recorded by every system as the most dependable method when hardware triggers are not practical in field conditions. Before any session, confirm every camera and sensor is recording the same sync event, note start and stop times for each device, and check for drift by comparing a second sync event near the end of the session.
How evidence led workflows turn gait captures into usable records
Raw frame data only becomes useful once it moves from capture to a format a vet or trainer can act on. A capture to process to vet ready trace workflow, with timestamped sessions and FEI compatible trot traces, turns a folder of video files into a comparable record over time. Offline access, owner portals and standardised exports matter in practice because they determine whether a useful capture actually reaches the people who need it. None of this replaces validation: any automated analytics output still needs a sense check against a known method before it informs a clinical or training decision, and clear data governance around who can see and edit a horse's records remains essential.
Comparison of frame rates in different horse breeds or athletic disciplines
The core sampling logic does not change between breeds, but the shortest event you need to resolve does, and that shifts the practical frame rate.
Racing disciplines such as flat and harness racing involve the fastest stride cycles and the shortest ground contact times, so studies in this space tend to sit at the upper end of the research tier or into specialised high speed territory. Dressage and show jumping research, by contrast, often centres on stride length and transition quality at trot and canter, where 150 to 240 fps captures the relevant detail without the storage burden of 1,000 Hz capture.
Breed and conformation play a secondary role. A smaller pony with a shorter stride and quicker cadence needs proportionally more samples per second than a larger warmblood moving at the same gait, simply because each stride phase passes more quickly. Draught breeds, with slower, longer strides, can often be assessed accurately at the lower end of a given tier.
The practical takeaway is to set frame rate by the shortest event relevant to the discipline and the individual horse's stride characteristics, rather than applying one fixed number across every breed or sport. A racing kinematics study and a dressage transition study are answering different questions, and their frame rate choices should reflect that.
Advances in camera technology enabling higher frame rates and their implications
Camera hardware capable of 500 Hz or 1,000 Hz capture has become markedly more accessible over the past decade. What once required dedicated lab equipment and specialist operators is now achievable with consumer and prosumer cameras, and some smartphones now offer slow motion modes well into the hundreds of frames per second.
This accessibility changes who can collect usable data. A sports photographer with a modern mirrorless camera can now capture footage at frame rates that would have needed a research lab's equipment a decade ago. That shift also raises the bar for everyone else: footage shared or published for research purposes increasingly needs to specify frame rate, shutter speed and camera placement so results remain comparable across studies and practitioners.
The flip side is a growing gap between what cameras can capture and what most workflows can process. Sensor and lens advances have outpaced the ease of synchronising, storing and analysing sustained high frame rate footage, which is why automated pose estimation tools such as DeepLabCut have become central to making high volume footage practical to analyse, provided camera placement and lateral perspective stay consistent enough for the model to track joints reliably.
Impact of lighting conditions on effective frame rate and image clarity
A camera's maximum rated frame rate means little if the light available cannot support the shutter speed that frame rate demands. Every doubling of frame rate roughly halves the exposure time available per frame, so a setup that looks clear at 60 fps in overcast daylight can produce dark, noisy, motion blurred footage at 500 fps in the same conditions.
Outdoor arenas and paddocks present particular challenges: shifting cloud cover changes exposure mid-session, and low sun angles create long shadows that confuse automated tracking software trying to follow a limb against the background. Indoor arenas often have uneven lighting, with bright patches near windows and dim corners, which can introduce inconsistent brightness across a single pass if the horse moves through both zones.
Supplementary lighting, where practical, extends the usable frame rate range considerably, letting a shorter shutter speed and faster frame rate stay viable without introducing excessive noise. Where supplementary lighting is not an option, scheduling sessions for consistent, even daylight and avoiding direct low sun angles is the simplest way to protect image clarity at higher frame rates. Whatever the lighting, a consistent, high contrast background behind the horse improves both human review and automated tracking accuracy more than almost any other low cost adjustment.

Balancing rigour and operational constraints in the field
The temptation is always to film at the highest frame rate available, but the better habit is matching the rate to the shortest event that genuinely matters for the question at hand, piloting that choice on a small sample first, and reporting the method clearly enough that someone else could repeat it.
— isaac
How a yard can operationalise movement analysis
Collecting good footage is only half the job. The other half is turning sessions into records a vet, owner or trainer can actually use without re-digitising video every time. We built EquiBETS around that gap, converting captured movement data into timestamped sessions with clinician-ready exports rather than leaving it stranded in a folder of raw files.
For yards weighing up whether to formalise this process, our platform handles the parts that tend to get skipped under time pressure:
- Timestamped session metadata so every capture is traceable back to date, horse and context.
- Owner updates delivered automatically, without a separate phone call or message thread.
- Exports formatted for vets and clinicians, cutting out manual reformatting before every appointment.
- Offline mobile access, so sessions can be logged in an arena or paddock with no signal.
Our EquiBETS Complete plan covers these tools for $9.99 AUD per month, with a free trial for yards that want to see the workflow before committing.
FAQ
What frame rate is best for filming horses?
The right frame rate depends on what you need to measure: 60 Hz is typically adequate for averaged trot stride timing, while precise limb transitions need 200 to 500 Hz. Specialised high speed events, such as exact hoof contact timing, generally need 1,000 Hz or more.
What is the 80/20 rule in horse racing?
This term refers to a betting and form analysis heuristic used in racing circles rather than a gait analysis standard, and it falls outside the frame rate and kinematic measurement scope covered here. It is not addressed by the equine gait analysis literature referenced in this guide.
What does milkshaking a horse mean?
Milkshaking refers to administering a substance to a horse before a race in an attempt to buffer lactic acid buildup and delay fatigue, a practice banned in regulated racing. It is unrelated to frame rate or video capture and sits outside the scope of gait measurement covered in this guide.
Can a horse run 100 km/h?
No validated gait analysis study in this guide supports a horse reaching speeds beyond documented thoroughbred racing speeds. Accurately measuring top speed requires the same frame rate principles covered above, including a frame rate matched to the shortest stride event and a calibrated scale reference.
How do I calculate stride length from video?
Count the frames between two repeating points in the stride cycle, divide by frame rate to get stride duration, and use a calibrated scale reference visible in frame to convert pixel distance into metres. At 60 Hz with 54 frames per stride, for example, stride duration works out to 0.9 seconds, which you can then pair with distance travelled to estimate stride length and speed.
Sources
Every gait measurement carries some uncertainty, and knowing its likely size matters as much as the measurement itself.
Combining algorithms or sensors can reduce measurement error for stance duration to below a few percent when validated against force plates. Published comparisons of motion capture and algorithmic detection show measurable millisecond biases between methods, with precision improving substantially when multiple algorithms or sensor types are cross-checked rather than relied on individually.
Frame rate is one contributor to error, but not the only one. Marker noise, occlusion of a limb mid-stride, and the specific detection algorithm used each add their own share of uncertainty, and these can compound in ways that are easy to miss if only one source is checked. A separate comparison of 60 Hz against 1,000 Hz recordings found mean stride and stance values were similar across conditions when averaged over many strides, but 60 Hz proved insufficient for pinning down instantaneous kinematic events.
For any study intended for reuse, report limits of agreement, sample sizes and stride counts, and the specific validation method used. In the field, running multiple trials, recalibrating distance references regularly and keeping labelling consistent across sessions are the simplest ways to keep error down without adding equipment cost.
- Equine gait analysis (UC Davis research page)
- Key kinematic variables measured in equine performance studies (PubMed)
- Inertial sensor technologies—Their role in equine gait analysis, a review (PMC)