
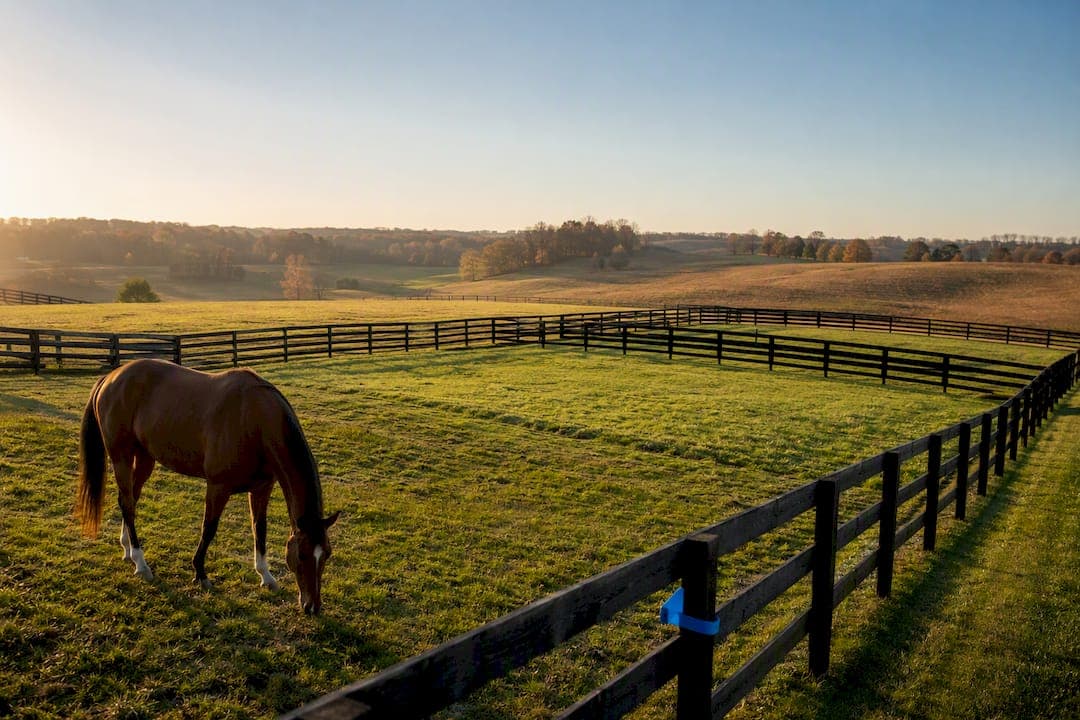
A pasture rotation plan works by dividing your land into paddocks and moving stock according to canopy height and recovery needs, not the calendar. Start today: sketch a one-row inventory for each pasture, noting acres, forage type and current grazing height, then mark out a sacrifice lot for wet weather or slow growth before you plan a single move.
TL;DR:
- Managing pasture rotation based on canopy height rather than calendar dates prevents overgrazing and promotes healthier, more resilient paddocks.
- Conducting an honest inventory of pasture size, forage type, and growth patterns ensures accurate paddock sizing and optimal grazing schedules.
- High-intensity grazing requires more paddocks and infrastructure but significantly improves forage utilization and recovery, so match intensity to available resources.
- Monitoring forage height, especially for cool-season grasses, and never grazing below 3 inches protects root reserves and avoids long-term pasture damage.
- Digital record-keeping platforms streamline tracking, reduce errors, and improve planning accuracy across seasons and team members.
Table of Contents
- How do you build a pasture rotation plan from scratch?
- How many paddocks and how big should they be?
- What height should grass be before and after grazing?
- How do you turn the inventory into a working schedule?
- What infrastructure does a rotation plan actually need?
- How do you know when the plan needs adjusting?
- What mistakes wreck a rotation plan?
- Where does digital record-keeping fit into rotation planning?
- How does livestock type change the rotation plan?
- How does rotation help spread nutrients across the farm?
- How do you manage weeds without disrupting the rotation?
- How do pasture species change through the seasons?
- What does a rotation plan actually save you?
- Practitioner perspective: start simple, improve every season
- Keep your rotation records in one place with EquiBETS
- Sources
- FAQ
How do you build a pasture rotation plan from scratch?
Every workable rotation plan starts with an honest inventory of what you've actually got, not what you assume you've got. Farmers who skip this step end up guessing at paddock sizes and moving stock on gut feel, which usually means overgrazing the paddocks closest to the barn and under-using the back forty.
Walk each pasture and record the following:
- Pasture name or number so you can track it on paper or in an app
- Grazeable acres, excluding ponds, wooded strips and laneways
- Pasture type: cool-season grasses (fescue, orchardgrass, ryegrass) or warm-season species (bermudagrass, bahiagrass)
- Typical seasonal growth pattern, since cool-season pastures peak in spring and autumn while warm-season varieties peak in summer
- Water access, whether that's a trough, pond or dragged hose
- Current canopy height, measured in inches
For mapping, a printed farm map, a marked-up Google Earth image, or a purpose-built farm mapping tool all work. Note where you'll run polywire for temporary subdivisions. To estimate forage on hand, use a grazing stick for a quick height reading, a clip-and-weigh quadrat for more precision, or the experienced "walk-off" method where you eyeball density across a paddock. Whichever method you choose, record everything in the same units every time. Mixing inches one week and centimetres the next wrecks your data before the season is half done.
How many paddocks and how big should they be?
The paddock count comes down to one formula: paddocks needed equal the recovery period divided by the grazing period, plus one. If your pasture needs 28 days to recover and you're grazing each paddock for seven days, you need five paddocks (28 ÷ 7 = 4, plus 1).
- Decide your management intensity first. Extension guidance splits this into three tiers: low intensity runs six to eight paddocks with rotations every five to seven days, medium intensity runs nine to 15 paddocks on a three to five day rotation, and high intensity runs 15 or more paddocks with moves every one to three days.
- Convert herd demand into paddock size. Work out your herd's daily dry matter demand, then divide by your estimated forage yield per acre to get the acreage each paddock needs to carry the mob for its grazing period.
- Choose a layout. A pie-shaped design radiating from a central water point cuts fencing costs and walking distance; a grid of square paddocks is simpler to survey but often needs more water points or longer lanes.
Higher intensity buys you more grass and better recovery, but it costs more in fencing, water points and your own time walking fence lines, so match the tier to what you can actually maintain.
Pro Tip: Start at the low end of your target paddock count in year one. It's far easier to add a temporary polywire subdivision mid season than to rip out permanent fence you decided you didn't need.
What height should grass be before and after grazing?
Move animals on canopy height, not on what day of the week it is. The standard rule for cool-season pastures is turn-in at roughly 6 to 8 inches and pull-out at roughly 3 to 4 inches, and you should never let animals graze below 3 inches, because that's where root dieback and erosion start creeping in.
This is the "take half, leave half" principle in practice. Grass regrows from stored root reserves and remaining leaf area; strip both away and the plant has to rebuild from almost nothing, which slows recovery for the whole rest of the season.
- Cool-season grasses: turn in at 6 to 8 inches, pull out at 3 to 4 inches
- Warm-season grasses: tend to tolerate slightly lower residuals but still need a firm floor to protect the crown
- Legumes such as clover: watch these closely, as overgrazing knocks back nitrogen-fixing nodules and thins the stand fast
- Drought or peak summer heat: lengthen rest periods regardless of species, since regrowth slows even when the paddock looks green
Grazing below that 3 inch floor is one of the fastest ways to turn a productive paddock into a compacted, weedy mess that takes a full season to repair.
How do you turn the inventory into a working schedule?
A grazing chart is where your inventory becomes a plan you can actually follow week to week. It's a simple grid: paddocks down one side, weeks across the top, and you fill in planned grazing days against actual grazing days as the season runs.
- Set your inputs. Note your turnout date, your farm's total grazeable area, and if you're using a spring rotation planner, the "magic day" when growth rate matches or exceeds grazing demand.
- Divide the farm into weekly targets. Early-season planners typically allocate roughly 40% of the farm to the first rotation and build toward 100% as growth accelerates, which stops you grazing the whole property too fast before grass has caught up.
- Plan backwards from fixed events, such as haying dates, breeding windows or a show season, and block those paddocks out first so the rest of the rotation fits around them.
- Fill the chart week by week as the season runs, noting actual days grazed against planned days, so you can see drift early rather than at the end of the season.
- Build in adaptive triggers: slow the rotation when growth outpaces grazing, speed it up when pasture is racing ahead of the mob, and pull a paddock out for hay if it's grown well past its ideal grazing window.
Missouri's grazing plan framework backs this up directly: set goals, inventory pastures, match forage to demand, build the schedule, then monitor and adjust as the season plays out. A chart on the wall of the tack room does more for consistency than any calendar reminder ever will.
What infrastructure does a rotation plan actually need?
Fencing and water are what make or break a rotation plan on the ground. Permanent perimeter fence gives structure, but portable electric fencing (polywire and step-in posts) is what lets you subdivide paddocks as forage growth changes through the season.
- Water: a centralised tank with laneways to each paddock costs more upfront but saves on troughs; in-paddock water points cost more to install but cut walking distance and speed up moves
- Sacrifice lot: a dedicated, non-grazed area with shelter, feed and water storage that absorbs stock during wet spells or slow growth, so main paddocks aren't forced to carry animals when the ground can't take it
- Lanes: even a rough gravel or geotextile lane between paddocks and water saves pasture from being pugged into mud by daily foot traffic
- Gates and access: locate gates where stock naturally want to travel, not where it's convenient to install them, to reduce standing and congestion at entry points
A sacrifice lot isn't a failure of planning. It's a permanent safety valve, and the farms that build one in from day one lose far less pasture to wet-weather damage than those that improvise a mud lot when the ground turns.
How do you know when the plan needs adjusting?
Your grazing chart is the record that tells you whether the plan is working or drifting. Log planned grazing days against actual days, forage height at entry and exit, and how many days each paddock actually got to rest before the next lot of stock went back in.
A handful of numbers matter more than the rest:
- Utilisation percentage: how much of the available forage stock actually ate versus trampled or left behind
- Paddock recovery days: actual rest achieved against your target rest period
- Animal weight or condition trends: a slow decline usually shows up before the pasture visibly looks short
- Rainfall versus expectation: a dry month changes your whole rest calculation, even if the paddock looks fine today
Managing by measured plant growth rather than a fixed schedule is what separates a plan that adapts from one that quietly fails. When rainfall falls short and paddocks aren't hitting target recovery, that's your cue to destock early, feed hay sooner than planned, or shift stock to the sacrifice lot rather than pushing on and hoping the next rain arrives in time.
Pro Tip: Photograph each paddock from the same fence post every time you enter and exit it. Six months of photos will teach you more about your own pasture's growth curve than any textbook.
What mistakes wreck a rotation plan?
Most rotation plans don't fail because the paddock math was wrong. They fail because of a handful of operational habits that quietly undo good planning.
- Managing by calendar instead of canopy height. A seven-day rotation written on paper means nothing if growth has stalled; check the grass, not the date, before every move.
- Underestimating the need for a sacrifice lot. Skipping this means your best pasture becomes the default mud lot the first wet week of the year. Budget for even a small dry lot before you need it.
- Dragging manure at the wrong time. Dragging to spread manure clumps only helps parasite control when conditions are hot and dry for several days; drag during cool or wet spells and you spread viable larvae across the whole paddock instead of breaking the cycle.
Each of these is cheap to fix once you know to watch for it, and expensive to unwind once a paddock is already compacted or wormy.
Where does digital record-keeping fit into rotation planning?
Paper grazing charts work, but they're easy to lose and hard to compare season over season. A shared digital record turns your pasture map, grazing chart and moves into something the whole team can see and update from the paddock, not just from the office.
- Mapping and paddock records kept in one place remove the guesswork of "which paddock did we graze last, and for how long"
- Offline forms let whoever's doing the move log entry height, exit height and date without waiting for phone signal, which matters on a lot of grazing country
- Owner portals keep absentee owners or partners informed on paddock condition and stock movement without a phone call
- Emergency plans and finance tracking sit alongside the grazing data, so vet access details and paddock costs live in the same record as your rotation history
Platforms like EquiBETS are built around this kind of field-ready record-keeping. The real payoff comes at season's end: store one year's grazing chart and pasture notes as a single record, and next year's planning starts from data instead of memory.
How does livestock type change the rotation plan?
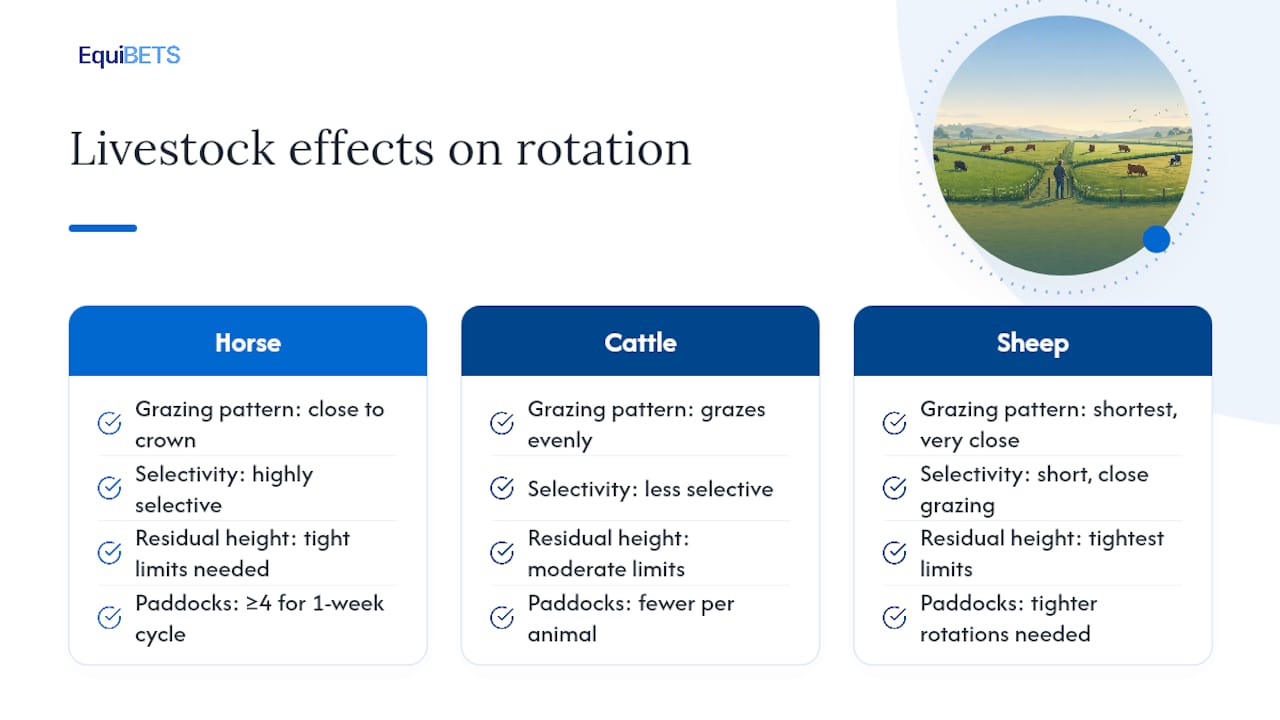
Horses, cattle and sheep graze differently, and a plan built around one species can badly misjudge another. Horses graze closer to the crown than cattle and are notoriously selective, often overgrazing favourite patches while leaving rough grass untouched nearby, which is part of why at least four paddocks are recommended for horses so each gets a full three weeks' rest on a one-week grazing cycle.
Cattle are less selective and graze more evenly across a paddock, which is why medium-intensity cattle operations can often run fewer paddocks per animal than an equivalent horse operation and still hit good recovery targets. Sheep graze even shorter and closer to the ground than cattle, so they need tighter residual height limits to avoid stressing the same plants horses would.
Stocking density interacts directly with all of this. A high stocking density on a small paddock for a short period concentrates impact and speeds up even grazing, but it also raises the risk of trampling damage if you leave stock there even a day too long. A light stocking density spread across a larger area gives more selective grazing (bad for even use, good for reducing overgrazing risk on sensitive species like horses).
The practical takeaway: size your paddocks and set your entry and residual heights around the actual species and stocking density you're running, not a generic template. A rotation plan tuned for cattle at medium intensity will often overgraze a horse paddock if you copy the numbers across without adjustment, because horses concentrate their impact on fewer, more favoured patches of grass.
How does rotation help spread nutrients across the farm?
One of the quieter benefits of a pasture rotation plan is what it does to manure distribution. Stock concentrated on one paddock for weeks at a time dump the bulk of their manure and urine in a small area, usually near water and shade, leaving nutrients badly unbalanced across the farm. Move stock through a full rotation and that manure gets spread more evenly paddock by paddock over the season.
That matters for two reasons. First, it reduces the build-up of nutrient hotspots that can leach nitrogen and phosphorus into waterways during heavy rain, which is a real concern on properties near creeks or dams. Second, it cuts your fertiliser bill over time, since manure spread evenly across paddocks does real work replacing bagged nutrients, whereas manure dumped in one corner does almost nothing for the rest of the farm.
Sacrifice lots complicate this picture. Because stock spend concentrated time there, nutrient loading in the sacrifice lot climbs fast, and that area needs its own management, whether that's periodic manure removal, composting or simply accepting it as a permanent non-grazed zone that gets treated more like a barnyard than a paddock.
If you're already logging paddock moves on a grazing chart, it's a small step to also note roughly how many days stock spent in each paddock over a season. That record tells you, in hindsight, which paddocks are quietly building up nutrients and which ones might be running short, which is useful information the next time you're deciding where to spread compost or adjust fertiliser.
How do you manage weeds without disrupting the rotation?
Weeds thrive in exactly the conditions that a poorly managed rotation creates: overgrazed, bare or compacted ground where desirable forage has thinned out and left space for something opportunistic to move in. The single best weed control tool in a rotation plan is simply not overgrazing, because a dense, healthy stand of grass out-competes most weed seedlings before they get a foothold.
That said, rotation on its own won't fix an existing weed problem overnight. A few practical adjustments help:
- Graze weedy paddocks earlier in their growth stage, when some problem species are more palatable to stock and more likely to get eaten down before they set seed
- Mow after grazing rather than before, to knock down anything stock left behind and stop it from seeding out before the paddock's rest period begins
- Spot-spray persistent patches rather than blanket-treating whole paddocks, which keeps herbicide costs down and protects the clover and other legumes you want to keep
- Extend rest periods on badly weed-affected paddocks so desirable species get extra time to thicken up and reclaim ground before stock return
Timing herbicide application around your rotation schedule matters too. Most products carry a grazing withholding period, so any spot-spraying needs to be planned into the grazing chart well ahead of the next scheduled move onto that paddock, not decided on the day you notice the weeds.
How do pasture species change through the seasons?
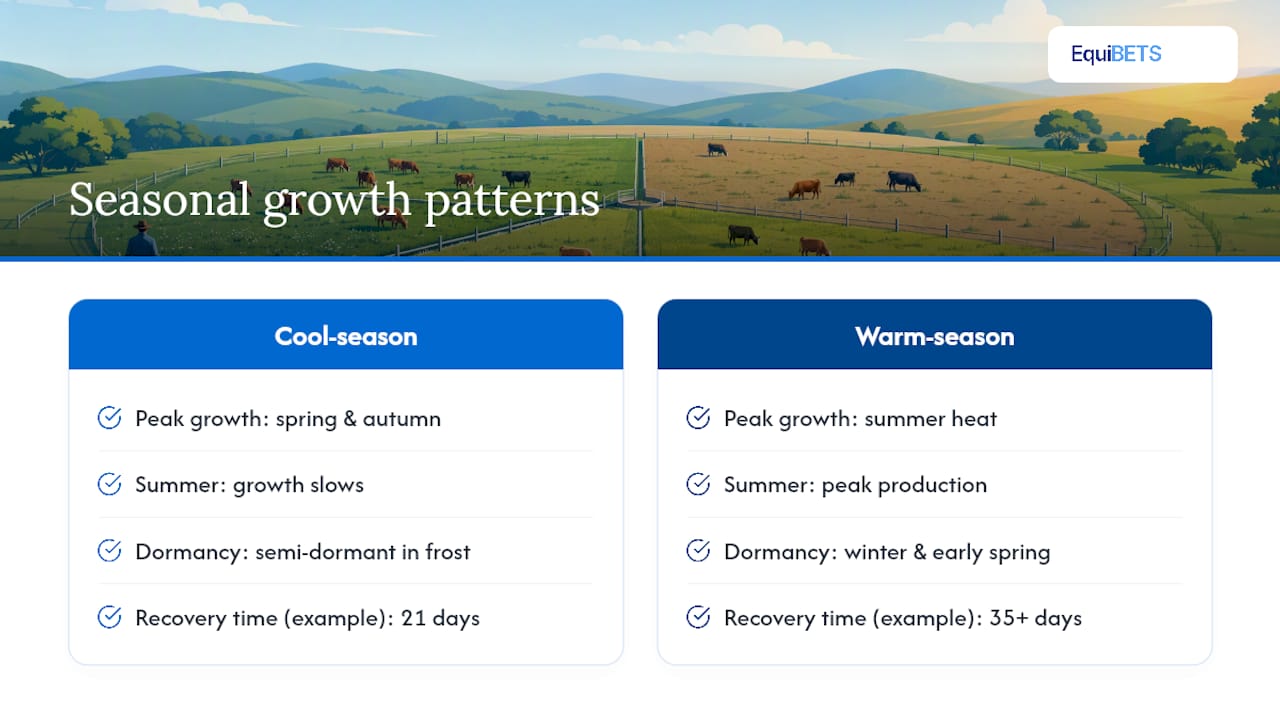
Cool-season grasses such as fescue, orchardgrass and ryegrass put on most of their growth in spring and autumn, slow right down in the heat of summer, and can go semi-dormant in a hard frost. Warm-season species such as bermudagrass and bahiagrass do the opposite: they hit peak production in summer heat and go dormant through winter and early spring.
This means a rotation plan written in April won't necessarily work in August, even on the same paddocks. A paddock that recovered in 21 days during a cool, wet spring might need 35 or more days to reach the same canopy height in a dry midsummer, simply because growth rate has dropped.
The practical fix is to treat your rest period as a range tied to season, not a fixed number. Build in shorter rest periods during peak spring flush, when you may need to speed the rotation up or take some paddocks out for hay to keep pace with growth, and longer rest periods through summer slumps or winter dormancy, when forcing the same rotation speed just strips paddocks down to bare dirt. Farms running a mix of cool-season and warm-season pasture can lean on the warm-season paddocks through the summer gap and swing back to cool-season paddocks once autumn rains arrive, smoothing out the total forage supply across the year rather than fighting a single species' growth curve.
What does a rotation plan actually save you?
The financial case for rotational grazing usually comes down to two numbers: how much pasture you grow and how much you spend feeding hay or concentrate to make up for what you didn't grow. Higher management intensity, meaning more paddocks and faster moves, increases both carrying capacity and forage utilisation, which in practice means running the same herd on less land, or a bigger herd on the same land, without buying in extra feed.
The upfront costs are real. Polywire, step-in posts, a good charger and extra water points all cost money before you see a return. But most of that infrastructure is reusable and cheap relative to a season of bought-in hay, and it typically pays for itself within a season or two on properties that were previously overgrazing a handful of large paddocks.
The less obvious saving is in labour and stress. A grazing chart that tells you exactly when a move is due, rather than a paddock that's already been chewed to dirt before you notice, means fewer emergency hay runs and fewer late nights moving stock in the dark because a paddock ran out unexpectedly. Weigh the fencing and water investment against a season of feed bills you'd otherwise be carrying, and for most grazing operations the rotation plan wins comfortably.
Practitioner perspective: start simple, improve every season
The biggest mistake I see in rotation planning isn't under-fencing, it's over-planning before you've grazed a single paddock. Start with four paddocks and a sacrifice lot, run one full season, and let the grazing chart show you where the plan actually broke down. Treat that chart as the farm's single source of truth for every move and every adjustment. Small trials, an extra temporary subdivision here, a different starting paddock there, teach you more in one season than any spreadsheet built before turnout ever will.
— isaac
Keep your rotation records in one place with EquiBETS
A suitable digital platform gives yards a single place to store the pasture map, grazing chart and paddock notes you've built while working through this plan, so nothing lives on a scrap of paper in the ute. The platform pairs offline field forms with owner portals and emergency plans, meaning a canopy height reading logged at the paddock gate syncs into the same record your team uses for scheduling and finance tracking.
For a yard running several horses across multiple paddocks, that consolidation matters more than any single feature. Emergency access details, feed costs and grazing history sit in the same workspace instead of three different notebooks. If you're building out a rotation plan this season, the Stable Manager module handles the scheduling and team coordination side directly. Equibets offers a free trial, so you can test whether digital record-keeping actually saves you time before committing to a subscription.
Sources
- How to make rotational grazing work on your horse farm
- Grazing plan quick-start guide (Regenerative grazing)
- SPES-707: Principles of rotational stocking
- Rotational grazing for Michigan horses (E3200)
FAQ
How often should you rotate stock between paddocks?
Rotation frequency depends on management intensity: low intensity moves stock every five to seven days, medium intensity every three to five days, and high intensity every one to three days, based on Virginia Cooperative Extension's stocking guidance. The real trigger is canopy height, not the calendar; move once grass hits your residual target.
How many paddocks do you actually need?
Use the formula paddocks equal recovery period divided by grazing period, plus one, which for horses typically means at least four paddocks so each gets roughly three weeks' rest on a weekly rotation. Cattle and sheep operations often run more paddocks at higher management intensity for faster recovery.
How do you design a rotational grazing system from scratch?
Start with a pasture inventory (acres, forage type, water access), decide your paddock count with the recovery formula, set entry and residual height targets, then build a grazing chart to track planned versus actual moves. Add a sacrifice lot before you need one, and adjust the schedule by measured forage height rather than a fixed calendar.
What are the downsides of rotational grazing?
The main downsides are upfront fencing and water infrastructure costs, the labour of moving polywire and stock more often, and the risk of overgrazing if moves are timed by calendar instead of canopy height. A digital record like a grazing chart, kept in a tool such as Equibets, reduces the labour and tracking burden considerably.
What height should pasture be when you move stock off it?
For cool-season grasses, remove stock once canopy height drops to about 3 to 4 inches, and never let animals graze below 3 inches, which risks root dieback and long-term pasture damage.