
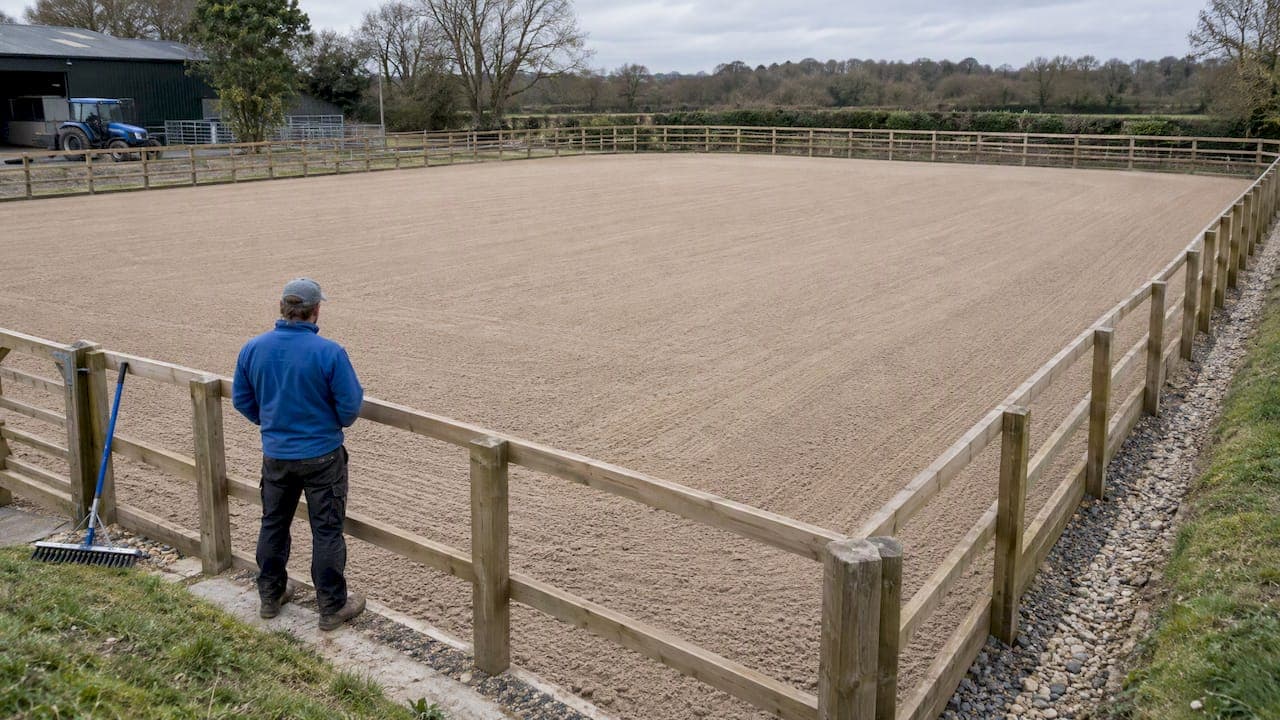
A workable arena layout gets four things right: correct dimensions for its primary use, engineered drainage through a crown or a consistent gradient, a three-layer footing matched to the discipline it serves, and a maintenance and testing routine that catches problems early. The sections below follow guidance from the FEI and the University of Kentucky to turn those four priorities into specifications, procurement questions, and a maintenance plan you can run week to week.
TL;DR:
- Proper arena dimensions vary by discipline, with dressage needing 60 by 20 meters and jumping areas requiring more width for turns.
- The footing consists of three layers: a top surface of 50 to 150 millimeters, a base of 150 to 200 millimeters, and an engineered sub-base managing drainage.
- Outdoor arenas typically use a crown slope of 1 to 2% for water drainage, or a flat surface with a maximum gradient of 1.5%.
- Regular testing of surface properties like firmness and grip, ideally monthly, is essential to identify wear patterns and prevent safety issues.
- Ongoing maintenance includes manuring, dragging, watering, and logging all activities digitally to ensure surface consistency and safety over time.
Table of Contents
- Arena dimensions and layout by discipline
- Footing structure: layers, thicknesses and material choices
- Drainage, crown and sub-base design
- Choosing footing for your discipline and constraints
- Installation timeline, cost drivers and procurement checklist
- Maintenance and monitoring: keeping the surface safe over time
- Operational controls and digital tools for arena upkeep
- Safety standards and regulatory compliance for arena construction
- Lighting and fencing options relevant to arena planning
- Impact of arena orientation on sunlight and wind exposure
- Planning pragmatically for longevity and horse welfare
- Managing the arena you've already built
- FAQ
- Sources
Arena dimensions and layout by discipline
Dressage arenas are built to two standard sizes: 60 by 20 metres for most competition levels, and 40 by 20 metres for smaller yards or lower-level schooling. Jumping and warm-up areas need more width for turning and approach lines, and Equestrian Queensland's facility standards list 60 by 20 metres as a common dressage benchmark alongside separate warm-up sizing guidance for clubs. For mixed-use yards running simultaneous schooling and warm-up sessions, the FEI suggests a warm-up area somewhat larger than standard dressage arenas, which spreads wear across a larger footprint and eases scheduling conflicts.
Beyond raw dimensions, a handful of layout decisions shape how usable the space is day to day:
- Position gates where drags, water carts and floats can enter without crossing the main riding surface.
- Keep a clear buffer between the fence line and any spectator or viewing area to avoid crowding during lessons or events.
- Plan lighting and power runs before footing goes in, since trenching afterwards disturbs the sub-base.
- Allow dedicated parking and turning space for machinery, separate from horse and rider traffic.
Getting the shape and access right at this stage avoids expensive retrofits once footing and fencing are in the ground.
Footing structure: layers, thicknesses and material choices
A riding arena surface is built as three distinct layers, each doing a different job. Get the stack wrong and no amount of top dressing will fix the drainage or stability problems underneath.
- Top riding layer: typically 50 to 150 millimetres (2 to 6 inches) deep, this is the surface the horse actually works on, and its material choice drives cushioning, grip and dust levels.
- Base layer: usually 150 to 200 millimetres (6 to 8 inches), this layer carries load and separates the riding surface from the sub-base, according to University of Kentucky's ID-265 guidance.
- Sub-base: an engineered foundation layer that manages drainage and overall structural stability, built to suit local soil and water table conditions.
Top layer materials range from coarse sand through to sand-and-fibre blends, polymer-coated sand and wood chip mixes. Fibre and polymer additives generally improve cushioning and cut down on dust, but they also add cost and can complicate maintenance if not matched to your drag equipment. Plain sand is cheaper and simpler to maintain but can compact harder and produce more dust in dry conditions.
Base and sub-base material choices have long-term consequences for drainage and stability. Crushed rock and compacted natural soil are common and generally reliable, but some crushed concrete products have been flagged in arena research for blocking drainage over time, so it pays to confirm the aggregate source and particle grading with your supplier before it goes down.
Drainage, crown and sub-base design
Outdoor arenas typically rely on a crown, a gently raised centre that sheds surface water towards the edges. The University of Kentucky recommends a crown slope of 1 to 2%, with a maximum drainage gradient of 1.5% where an arena is instead built as a flat, elevated, well-drained surface without a crown.
Sub-base approaches vary in cost and performance:
- Compacted natural soil works where drainage is already good and budgets are tight.
- Crushed rock sub-bases are a common middle ground, offering solid load-bearing capacity.
- Permavoid or void-unit systems cost more to install but can meaningfully reduce shock transmission through the footing, based on arena surface research comparing sub-base types.
Before any of this goes in, commission a geotechnical survey, plan erosion control for the construction period, and map cut-and-fill volumes so contractors can quote accurately and plant access is sorted ahead of time.
Pro Tip: If your arena has a crown, drag end to end rather than repeatedly crossing the centre line, since constant crossing flattens the gradient and undoes the drainage benefit.
Choosing footing for your discipline and constraints
Different disciplines place different demands on the same four functional properties: firmness, cushioning, grip and responsiveness. Dressage tends to favour a slightly firmer, more responsive surface that supports collected, precise movement, while jumping and cross-country schooling benefit from more cushioning to absorb landing forces. Western and reining disciplines often need a looser, more consistent surface that supports sliding stops without excessive grip.
Moisture and density change these properties substantially. Research into sand-and-fibre surfaces found that shifts in moisture content in a moderate range, together with compaction density, meaningfully altered traction, hardness and cushioning, with knock-on effects for peak loads on limbs and therefore injury risk (NTU arena surface study).
Match the blend to your maintenance capacity and climate:
- Sand-only footing suits yards with reliable watering and lower budgets, but needs careful moisture management to avoid becoming too hard or too loose.
- Sand-and-fibre blends hold moisture better and suit yards that can't water as frequently.
- Polymer-coated or synthetic surfaces cost more upfront but offer the most consistent performance across seasons for yards running heavy competition schedules.
Installation timeline, cost drivers and procurement checklist
A full arena build generally runs through five stages: survey and design, earthworks and drainage, base formation, top layer installation, and final compaction and commissioning. Depending on scale and weather, this can take anywhere from a few weeks for a straightforward schooling arena to several months for a competition-grade build with extensive drainage works.
The biggest cost drivers are usually:
- Drainage works, particularly where the water table is high or soil drains poorly.
- High-spec sub-base systems such as permavoid, compared with conventional compacted rock.
- Specialist top-layer materials like polymer-coated sand or fibre blends.
- Plant hire and skilled labour for grading, compaction and surface laying.
When tendering the job, ask contractors for material specifications in writing, compaction test results, a drainage plan showing gradients and outfall points, a proposed maintenance schedule, and references from previous arena installs you can actually contact. For complex sites, particularly where soil conditions or water tables are uncertain, a civil engineering assessment of earthworks and foundation options before you commit to a sub-base design can save significant rework later.
Maintenance and monitoring: keeping the surface safe over time
Daily upkeep starts with manure removal and a consistent dragging pattern to redistribute footing evenly and prevent ruts from forming in high-traffic zones like corners and centre lines. Watering frequency depends on climate and footing type, but most yards need at least a light pass before each day's heavy use in dry conditions, with top-dressing added seasonally as the top layer compacts or thins.
- Log drag passes, watering volumes and any top-dressing added so patterns in wear become visible over time.
- Run spot checks for firmness and depth in high-traffic areas, not just the centre of the arena.
- Watch for pooling, dust build-up or hard patches, all signs the surface needs attention before a horse does.
Arena testing typically checks five functional components: firmness, cushioning, grip, responsiveness and uniformity, and tools like OBST (Orono Biomechanical Surface Tester) quantify these properties rather than relying on visual inspection alone (University of Kentucky testing overview). Research into outdoor arenas also found significant spatial and temporal variation within a single surface, meaning one measurement at one point in time tells you far less than repeated sampling across the arena and across seasons.
When problems persist, match the remedy to the cause: localised relaying for isolated soft or hard spots, additional top dressing where depth has thinned, clearing blocked drainage outlets where water is pooling, and full resurfacing only when depth loss or contamination is widespread and persistent.
Operational controls and digital tools for arena upkeep
Paper logs for drag hours, watering volumes and test results tend to fall behind once a yard gets busy. Digitising that record keeping makes upkeep consistent and auditable, so you can spot drift in firmness or depth before it becomes a safety issue.

The same system is worth extending to emergency planning: a live hazard list and evacuation routes, with contact details accessible to vets and first responders, turns a paper folder into something usable in the moment. For an arena specifically, track test results, drag machine hours, watering volumes and top-dressing additions in one place so the maintenance history travels with the facility, not with whoever happened to write it down.
Safety standards and regulatory compliance for arena construction
Competition-grade arenas built for FEI-recognised events need to meet specific requirements around size, boarding, fencing and footing performance, and the FEI's venue operational requirements call for a footing advisor and formal testing sign-off ahead of major events. That advisor role, sometimes called an International Technical Official (ITO) for footing, exists specifically to assess surfaces against competition standards before horses compete on them.
For training and lesson arenas that never host FEI-level competition, the regulatory picture is lighter, but the underlying safety principles still apply: predictable footing, secure fencing, clear sightlines for instructors, and drainage that doesn't leave standing water or ice in cold conditions. Local facility standards, such as those published by Equestrian Queensland, give practical dimensional and clearance benchmarks that club-level and training facilities commonly follow even without a formal compliance requirement.
Because requirements vary by discipline, event level and location, the safest approach for any competition-grade build is to confirm current standards with the relevant national or international federation before finalising dimensions, fencing height and footing specification, rather than relying on general guidance alone. For everyday training arenas, following the same dimensional and drainage principles still delivers a safer, more durable surface even without formal sign-off.

Lighting and fencing options relevant to arena planning
Lighting needs depend heavily on your training schedule. Yards running lessons or schooling after daylight hours need even, glare-free coverage across the full surface, not just the centre, since horses and riders need consistent visibility right into the corners where most turns and transitions happen. Running conduit and power before footing installation avoids expensive retrofitting later, as trenching through a finished sub-base can undo drainage work.
Fencing choice depends on use and budget. Timber rail fencing remains common for its appearance and rider familiarity, though it needs regular maintenance in wet climates. PVC and vinyl rail systems cost more upfront but need less ongoing upkeep and hold their appearance longer. For arenas hosting young or green horses, solid lower boarding (kickboards) around the base of the fence line reduces the risk of a leg going through the rails and gives a visual ground line that helps horses judge the footing edge.
Whatever fencing is chosen, gate placement should line up with the access points identified during the dimensions and layout stage, so machinery, horses and riders aren't competing for the same narrow entry.
Impact of arena orientation on sunlight and wind exposure
Arena orientation affects both rider comfort and footing performance. A north-south long axis (in the Southern Hemisphere) generally reduces the amount of time riders and horses spend working directly into low sun during morning and evening sessions, which matters most for yards running lessons at either end of the day. Orientation relative to prevailing wind matters too: an arena aligned to catch cross winds along its long axis can make dust management harder in dry footing and create uneven drying patterns after rain.
Where the site allows a choice, orienting the arena to balance both factors, sun angle at peak usage times and shelter from prevailing wind, tends to produce the most comfortable and consistent surface over the year. On exposed sites, windbreaks or partial screening along the windward boundary can reduce surface drying unevenness and make footing moisture easier to manage with a standard watering routine.
Planning pragmatically for longevity and horse welfare
Uniform, maintainable footing beats a flashy, high-maintenance finish every time. For competition-grade builds, bring in a footing advisor early and start your maintenance log from day one.
— isaac
Managing the arena you've already built
Good construction decisions only pay off if the day-to-day upkeep keeps pace with them. We built a platform to give professional yards one place to track that upkeep: maintenance schedules, test logs, drag and watering records, and the owner notifications that keep everyone informed without extra admin.

Alongside arena-specific records, we also support:
- Centralised stable task scheduling so maintenance doesn't slip during busy weeks.
- Hazard mapping and emergency plans that keep evacuation routes and vet contacts current.
- A stable manager workspace that consolidates test results, machine hours and top-dressing logs in one record.
None of this replaces good construction choices, but it does make sure the work you put into planning a proper arena actually holds up over years of use. EquiBETS Complete is available from $9.99 AUD per month, with a free trial if you want to see how the logging and emergency planning tools fit your yard before committing.
FAQ
What is the standard dressage arena size?
Standard dressage arenas are built to 60 by 20 metres for most competition levels, with 40 by 20 metres used for smaller schooling arenas, as reflected in Equestrian Queensland's facility standards. The larger size suits full dressage test requirements, while the smaller version works well for daily training.
How deep should arena footing be?
Arena footing is typically built in three layers: a top riding surface of 50 to 150 millimetres, a base layer of 150 to 200 millimetres, and an engineered sub-base beneath that, according to University of Kentucky's ID-265 guidance. Exact depths depend on the top layer material and expected traffic.
What crown slope do outdoor arenas need?
Outdoor arenas generally use a crown slope of 1 to 2% to shed surface water towards the edges, or a maximum drainage gradient of 1.5% for a flat, elevated design without a crown (University of Kentucky). The right choice depends on site drainage and soil conditions.
How often should arena footing be tested?
Arena surfaces vary across their footprint and over time, so repeated spot-testing rather than a single check gives a more accurate picture of firmness, cushioning and uniformity. A monthly or seasonal testing cadence, logged consistently, helps catch drift before it becomes a safety problem.
Does EquiBETS help manage arena maintenance records?
EquiBETS Complete lets yards log maintenance schedules, test results and watering or top-dressing records in one workspace, alongside owner portals and emergency plans. It doesn't replace footing design or construction decisions, but it keeps the ongoing upkeep organised and auditable.
Sources
- ID-265: Riding Arena Footing: Materials and Characteristics (University of Kentucky)
- Arena surface testing overview (University of Kentucky / industry white papers)
- Effects of moisture, density and drainage on sand-and-fibre arena surfaces (Procedia/NTU research)